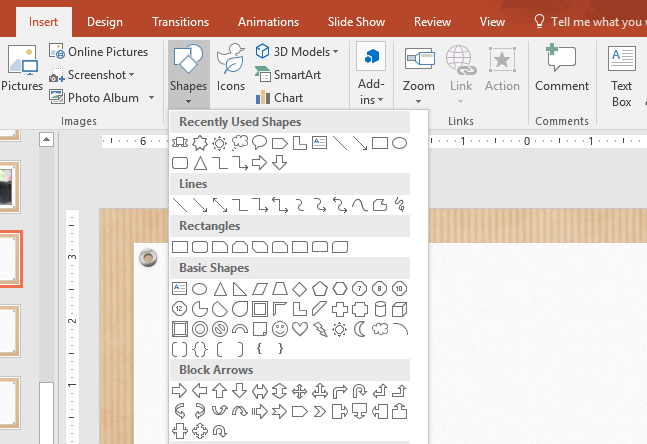
You’ll find shape tools in several locations within PowerPoint’s tabs. On the Home tab, you can insert a PowerPoint shape by selecting one from the Shape Gallery in both the desktop version of PowerPoint (Windows/macOS) as well as in PowerPoint Online. You can also access an expanded Shape Gallery using the Shapes tool on the Insert tab. In PowerPoint for Android and iOS, the Shapes tool can be accessed via the Insert tab.
Simply select the shape you want and then click the slide in the location you wish it to appear. From there you can:
- Resize the shape by clicking and dragging its sizing handles.
- Move the shape by clicking within it and dragging it to a new location.
- Rotate the shape by clicking the rotation handle above the shape and then dragging it left or right.
- Delete the shape by clicking within it and then pressing the Backspace key on your keyboard.
 Simple shape edits
PowerPoint also provides tools to edit any shape you’ve already inserted. You can quickly change the Shape Fill, Shape Outline, and add Shape Effects using the tools on the Home tab. For even more options, navigate to the Drawing Tools Format tab where you can:
- Edit Shape. Use this tool to change the shape to an entirely different selection in the Shape Gallery or adjust individual points to create a freeform result.
- Shape Styles. Quickly change your shape fill, border, and effects to a variety of preset combinations within your PowerPoint theme. Hover over each one to see a preview of the results.
- Shape Fill. Choose a new fill color, add a gradient or texture, or fill the shape with a picture.
- Shape Effects. Add shadow or glow, bevel the shape’s edges, and more.
This is an excerpt from PowerPoint Basics In 30 Minutes. The book is a available for purchase on Amazon, B&N, Apple, and other online stores.
